

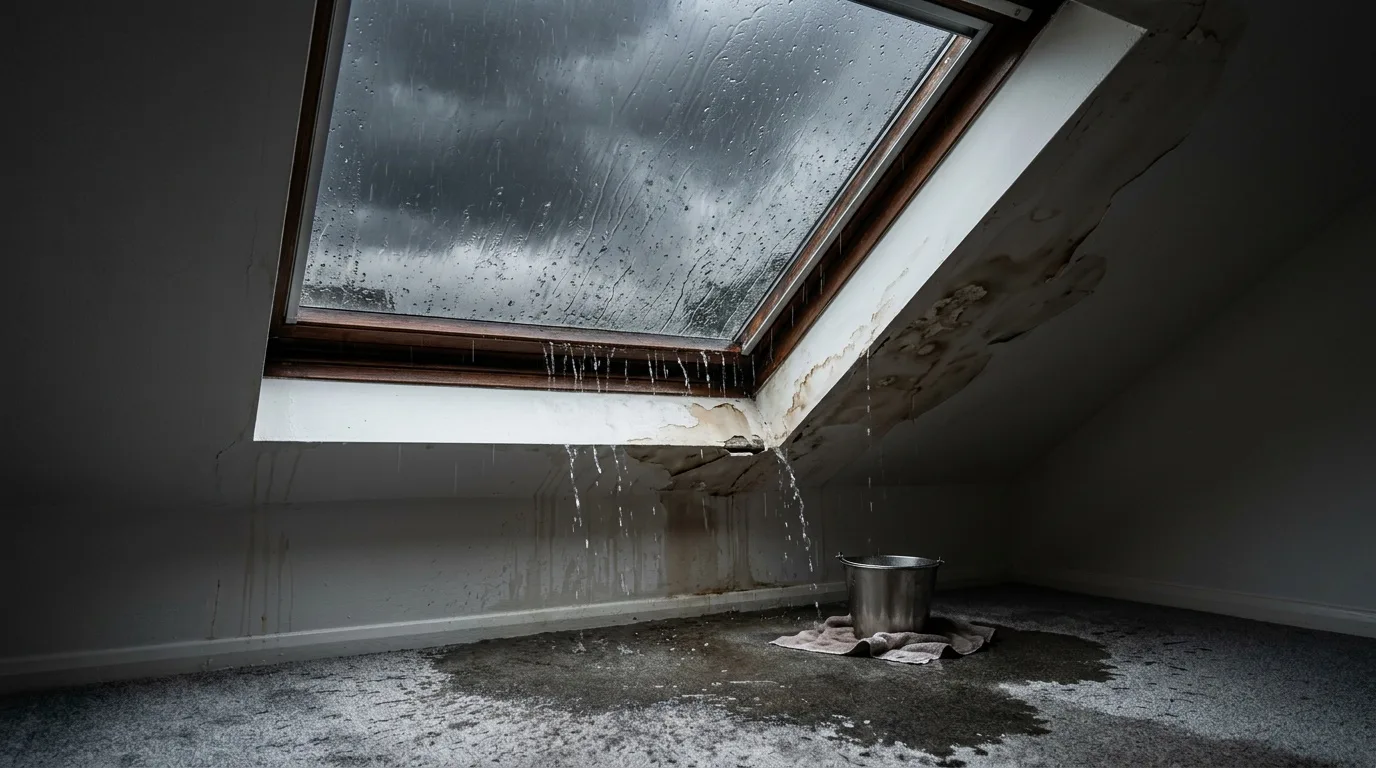
A skylight turns an attic or a top-floor room into a bright, comfortable space, but it is also a frequent source of trouble. If the builders followed the installation instructions and the owners followed the rules of use, a roof window will serve for a long time without dripping. But with installer mistakes or worn materials, water will start getting into the gaps. A skylight leaking is not only a cosmetic problem: dampness ruins the finish, spreads mold, makes surfaces rot and stain, and soaks the insulation until it is useless. The sooner the owners find the leak and deal with it, the more of the room under the roof stays intact.
Below we go through why a skylight is leaking, how to find the gap, what can be repaired by hand, what to do inside the house while water is coming through, and when to call a pro.
Why a Skylight Is a Vulnerable Spot
A roof window is set into the plane of the slope, and it changes how the whole roof behaves. Unlike plain roofing, it creates extra drainage points and places where water flows concentrate. The roofing itself is watertight, but its overlaps, the underlayment and the window flashing have to work together so that water running down the roof goes around the joints and does not get inside.
A skylight is built so that the chance of a leak is higher than with an ordinary vertical window:
- The slope. The unit is tilted relative to the wall and floor, so rain hits it directly and wind drives moisture onto it. On an angle the water runs off and does not stand, but it can still end up under the protective parts.
- Flashing all around. A sloped window is surrounded by flashing and aprons that must sit tight against the roofing. If they are even slightly skewed or there is a thin gap between them, moisture will get in.
- Condensation. In early spring, late fall and the cold months, condensation settles and runs down the frame. It looks like a leak, but it is not one.
- Temperature swings. The frame and seals change size with temperature. Over time this makes the joints lose their tightness.
- A tight space. The window is installed in a limited space between the rafters, the insulation and the vapor barrier. This raises the chance of mistakes in leveling and sealing.
All of this makes a skylight far more demanding about materials, installation and upkeep than an ordinary window.
Leak or Condensation?
A separate group of problems are effects that are often taken for leaks but have other sources. Condensation in the space under the roof, on the inside surface of the skylight or in the insulation forms when ventilation is poor. It can happen even when the joint is perfectly tight: when warm, humid air is not carried out of the room in the cold season, moisture forms on the cold surface. Visually it looks like a leak, but the fix is not sealing. It is correcting the ventilation of the space under the roof and the humidity of the room.
The difference between the temperature of the room air and the outside air touching the outer glass causes condensation. It runs down the glass and the frame, and that looks like a skylight leaking water. If the water only shows up in cold, dry weather and not specifically when it rains, look at humidity first. If it appears during a downpour, the source is outside.
Causes of a Skylight Leaking in Heavy Rain
Roof windows leak for basic reasons and for seasonal ones. The basic ones are installation mistakes, old seals and sealants, wrong or broken flashing, a sash that does not close tight, condensation, poor ventilation and clogged drainage.
- Incorrect installation. If the crew skewed the window while setting it, did not get an exact joint with the waterproofing or laid the roofing wrong, gaps appear around the window or under the flashing. The joints of the water barriers and the vapor barrier can also be done wrong. Another frequent error is spray foam applied any which way.
- Wrong direction of overlaps. Water pushed by wind or collected in valleys runs along the joints of the sheets and can get under the roofing above the window. If the waterproofing apron of the window is laid without regard to how water moves, leaks start that are not visible on the surface at first.
- Old seals or sealant. Silicone, rubber and EPDM, which seals are often made of, lose their elasticity over time, get a net of cracks, flatten and split into layers. Sealants peel away from the base and crack in direct sun and from temperature swings.
- Mismatched or skewed flashing. When the profile of the flashing and the profile of the roofing do not line up, or the builders skewed the flashing during installation, moisture can run under it. Rust and bent metal also break the seal.
- Damaged roofing near the window. Cracks, chips, shifted tiles and separated roof joints give water access to the space under the flashing.
- Sash or hardware. When the sash does not close tight because of loose hinges, old adjusting mechanisms or poor alignment with the frame, gaps appear.
- Structural movement. This happens when a house settles, rafters shift or frames warp. Parts stop fitting tightly against each other, and a leak appears. This is also one reason for a skylight leaking after a new roof: if the roofing around the unit was disturbed and the flashing was not refitted, the joint no longer matches.
- Wrong materials. Seals or sealants chosen without regard to the local climate (temperatures, number of sunny days a year, humidity) wear out faster.
A typical cause of moisture around the window is clogged drainage and debris. Because of it, water stays near the window joints and starts pressing on the sealed seams.
Causes by Season
In spring and fall, moisture appears under and around the window from rain and damp air, so in between seasons check that the sealant and seals are whole and that the roof has no damage. In summer, sealant and seals overheat from heat and direct sun and crack over time. To protect against leaks in summer it is better to use sealants and seals that do not break down from high temperatures and UV.
How to Find Where the Skylight Is Leaking
To understand how to fix a skylight leaking, you have to find the spot where water gets in. It is not always easy. Water can get through the smallest cracks and then travel along the inside structure of the house before it shows up below, so a wet spot on the ceiling is not always right under the place that leaks. These are the steps:
- Inspect the roofing around the window. Check whether the roofing has cracked, tiles have lifted from the base, or there is rust or shifted material. Also inspect the flashing: how even it is, how tightly it sits on the roof, whether there are gaps, what state the screws are in.
- Check the interior trim. Damp spots, brown rust-colored areas and wet insulation should worry you here. Also look at the seals of the frame and sash. If there are cracks, flattening or peeling, the seals are replaced. Make sure the hardware has no play and is adjusted.
- Do a spray test. In dry weather, slowly pour water on the window from outside, as if it were raining. Someone inside watches where drops appear. Start from the lower parts and move up gradually to catch the moment water starts coming through.
- Check the joints. Soapy foam or a source of light smoke works for the seams. If bubbles form or smoke is drawn in at some spot, there may be a gap there.
- Measure moisture. A moisture meter is used to check the trim, the insulation and the materials around the unit. If damp surfaces are found, the leak has been going on for a long time.
- Check nearby areas. The leak may not be where the water appeared. Check the side and top joints, the waterproofing membranes, and the materials and structures above the window.
A careful check shows which part failed: the seal, the sealant, the flashing, the roofing or the ventilation.
Temporary Measures Until the Real Repair
When it comes to a leak, time works against you. The longer water gets inside, the more damage it does. So even if a full repair is planned, it is important to take temporary measures first. Before going up on the roof, think about your safety: use a sturdy ladder, wear non-slip shoes and, if possible, use fall protection. Do not go up on a wet or slippery roof, or in wind. If you feel unsure, wait for dry weather or call a roofer.
- Roof sealant. If the leak comes from a small crack or hole, clean the surface around the damage of dirt and debris, then apply sealant in a thick layer. Make sure it fully covers the damaged area and goes a little onto the intact material.
- A tarp or plastic sheeting. For larger damage, cover the area with a tarp or heavy plastic, held down with heavy objects (bricks, boards) or outdoor tape. Make sure it is stretched and fixed so that water runs over it, not under it.
- Roofing tape. Special waterproof roofing tapes can temporarily close small damage. Clean and dry the surface before using it.
Remember that these are only temporary measures. They will not remove the problem, but they give time to prepare the full repair. After that, watch the forecast and plan the real work as soon as possible.
Protecting the Room Below
- Collect the water. Put buckets, basins and containers under the leak. Use old towels or rags to soak up water that got onto the floor or furniture. If the ceiling is sagging with water, keep everyone out from under it and leave draining it to a restoration crew.
- Move furniture and appliances. Move them away from the leak. If that is not possible, cover them with waterproof material such as plastic sheeting. Large or valuable contents sometimes have to come out of the room altogether, which is where pack-out and contents storage services come in.
- Ventilate. Open windows and doors in the room where the leak happened. Good ventilation helps dry the air and prevents mold and a damp smell. If you have a dehumidifier, use it.
- Take photos. Photograph all the damage. It can be useful for the insurance company or simply to track the repair.
Pay special attention to electrical appliances: their contact with water is very dangerous. Turn off power to the affected room at the breaker to avoid a short circuit and electric shock, especially if water is dripping from the skylight frame next to a light fixture.
Skylight Leaking: Who to Call
Sometimes a leak, or just high humidity around the skylight, cannot be fixed by hand. In those cases people call a roofing or window contractor. Examples:
- The cause is hidden and the problem area cannot be found.
- A large area of roofing has to be taken apart, or complex flashing replaced.
- The window was installed wrong and has to be replaced.
- The skylight is non-standard in shape or made of several segments.
- The rafters are damaged.
- A self-repair could void the warranty on the window.
- The window is high up.
A common practice is to fix the consequences without touching the structure: repaint the trim, change the seals, add sealant. These measures give an illusion of control but do not deal with the cause, and after one or two seasons the problem returns, often worse. Proper restoration of the skylight joint often requires partial removal of the roofing around it. That is the roofer's job.
What happened below the window is a different job. A wet ceiling, soaked insulation and damp framing need a water damage restoration crew in La Jolla with moisture meters, thermal cameras and drying equipment, not a new layer of caulk. You can read more about our restoration team and what local homeowners have said.
Drying the Ceiling Drywall and Insulation
If defects are not diagnosed in time, the consequences are complex. Water in the insulation lowers its thermal performance, which raises heating and cooling costs. Wooden sheathing and rafters in a damp environment lose strength and become a source of rot. The interior finish needs repair or replacement.
After the leak is temporarily stopped, inspect all the affected areas closely. Look at the ceiling and walls for discolored spots, bubbles, swelling and mold. Judge how wet the insulation in the attic is. Wet insulation loses its insulating properties and can become a source of mold; if possible, dry it, or if it is badly damaged, prepare to replace it. If carpet or drywall got wet, dry them as thoroughly as possible. Sometimes part of the drywall has to be removed to reach the wet structure and keep mold from developing. Do not leave wet materials for long. How long this takes depends on the house and the materials, and there is a separate article on how long drying out a house takes.
Mold Around a Leaking Skylight
Wet materials are an ideal environment for fungus. Look for traces of moisture on rafters, sheathing and insulation, and for mold and rot along the eaves. If the skylight is losing heat, condensation will keep feeding the same damp spots, so the window may need replacing with a newer double-pane unit. If the source of the water is condensation, the room air has to be dried, otherwise other measures will not solve the problem.
The EPA's brief guide to mold and moisture covers the basics for homeowners. If growth has already spread behind the drywall or into the insulation, it is a case for professional mold remediation work.
Care Is the Best Prevention
Preventing skylight leaks is more sensible than searching for them after dampness and a ruined finish show up. Some advice:
- Inspect every six months or year, even if everything looks fine. A planned check of the joints two to three years after installation helps catch hidden defects before serious consequences.
- Remove debris and dust that block drainage or wear out the seals.
- Lubricate the hardware and mechanisms.
- Replace seals on the manufacturer's schedule, even if they look new.
- Dry the air in a damp room.
- Air out the room under the roof so humid air does not sit and condense.
A leaking skylight is a signal of poor installation, aging materials or changed conditions of use. In many cases the problem can be solved without major repair. The main thing is to find the cause and act in order. More articles like this are on our water damage news page, and our La Jolla restoration home page lists all services.