

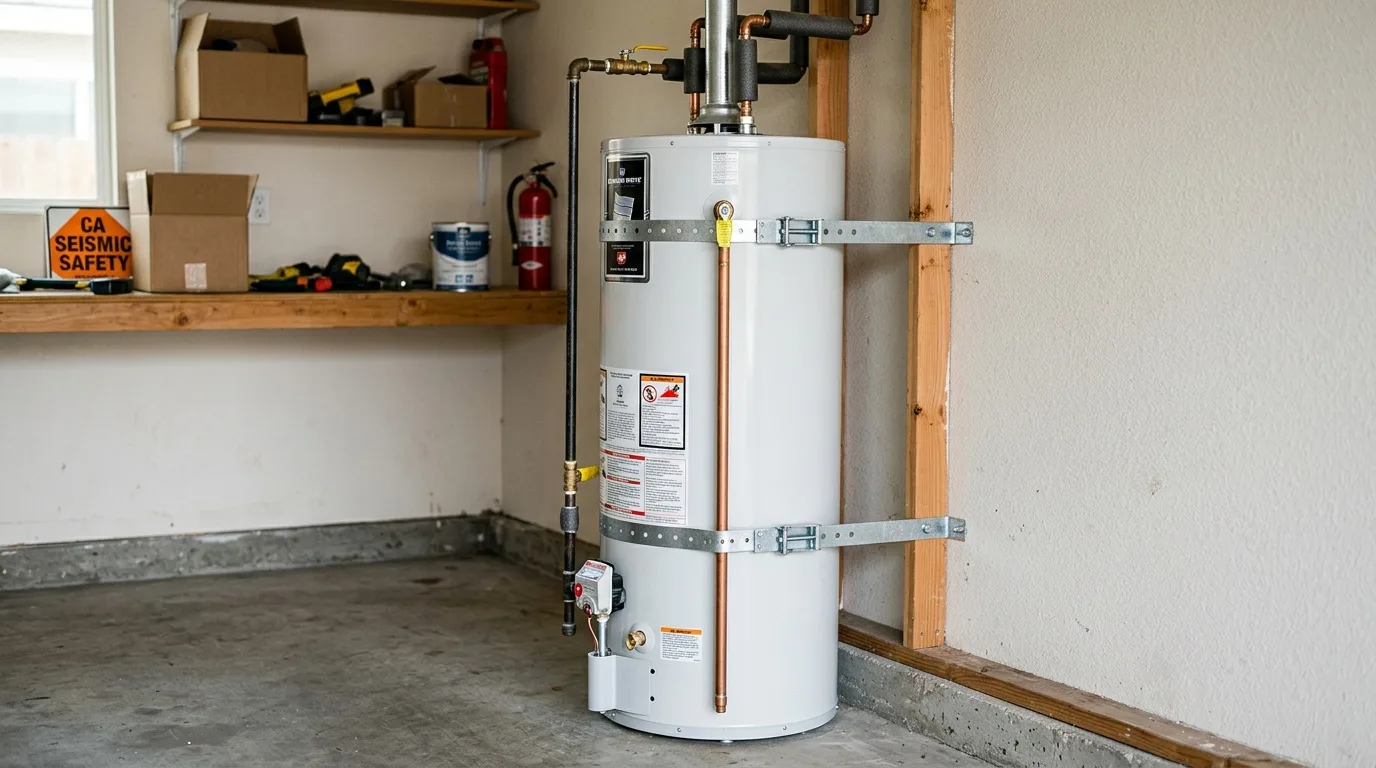
A storage water heater is a heavy tank on a small base. It holds tens of gallons of water, and it is tied to the house by a cold line, a hot line and, on many homes, a gas line. When the ground shakes, the tank can shift or tip. The lines do not move with it. They tear, and then the water from the tank and from the supply goes onto the floor.
In California this is not left to the owner's taste. Below is what the water heater strapping requirements in California look like in San Diego practice, how a tank is fastened and connected, why a drain pan is needed, what to check after a quake, and what to do if the tank has already failed and the room is wet.
Why Tanks Fall and Lines Break in a Quake
Earthquake preparation guides start with the same list. Secure cabinets, shelving, the TV, the water heater and heavy shelves, especially the ones that can fall on a bed, a sofa or a place where someone works. Move heavy things to the lower shelves. Do not keep glass, tools and household chemicals overhead.
The water heater is on that list for a reason. It is heavy, it is full, and it is connected. A tank that falls takes its connections with it.
Installation guides say the same about weight from the other side:
- Heavy tanks need more fastening points. The larger the tank, the more firmly it has to be fastened to the wall.
- Big tanks need solid backing. The straps are fastened into the wall studs, not into drywall alone.
- Drywall needs reinforcement. A tank against a drywall wall is strapped with special care, and the fasteners go into the framing behind it.
The Strapping Rule: What the Code Says
The City of San Diego water heater technical bulletin refers to California Plumbing Code section 507.2. Its main points:
- Water heaters must be strapped. The tank is strapped against earthquake movement.
- Two straps, in set places. The straps go within the upper third and the lower third of the tank.
- The lower strap stays clear of the controls. It is placed at least 4 inches above the controls.
- A pan where a leak could cause damage. In those locations an approved safe pan with a drain of at least 3/4 inch is required.
So the question of water heater straps code is not only about whether there are straps. It is also about where they sit on the tank.
Strap Kits and How to Strap a Water Heater
A water heater strap kit gives the straps and the hardware for the wall. Seismic water heater straps only work as well as what they are fastened to, so most of the work is the wall.
Fastening to the Wall
- Choose the spot. Keep the clearances the manufacturer's instructions call for.
- Mark the holes. Mark them on the wall by the kit's template, over the wall studs.
- Set the fasteners. Drive the kit's screws into the studs and tighten the straps around the tank.
- Check the level. After the tank is in place, check it with a level horizontally and vertically.
The general rule is to install a water heater strictly by the manufacturer's instructions. Some manufacturers also require checking, before filling with water, that the heater stands level and is well fixed to the wall. The electrical or gas part and the wall fastening are not simple work, and the installation is best left to a licensed plumber.
Flexible Connectors and Shutoff Valves
Connections can be made with flexible connectors or with rigid pipe. Flexible connection is simpler.
- Cold inlet. The cold water line of the tank (often marked blue) has its own shutoff valve, so the water can be closed off quickly.
- Cold supply. A flexible connector joins that valve to the tank's cold inlet.
- Hot outlet. A second flexible connector joins the tank's hot outlet to the hot line.
- Sealing. All threaded joints are sealed with PTFE tape. Rubber gaskets go under the union nuts. Tighten by hand first, then with a wrench.
Before the first start the tank is always filled with water. Otherwise the heating element can overheat. After filling, check every joint for leaks.
The Drain Pan and the Relief Valve Drain
A discharge pipe is put on the outlet of the relief valve and led to the drain. When water heats and expands, the valve sometimes drips.
Where a leak could cause damage, the San Diego bulletin adds the approved safe pan with a drain of at least 3/4 inch under the tank. The pan does not stop a leak. It gives the water a way out before it reaches the floor, the walls and the room below.
Checking After a Quake
First check yourself, then the people near you, after that gas, electricity, water and the way out.
If you smell gas, do not switch on lights, switches, flames or appliances. If it is safe, open the windows, shut off the gas outside or at the meter, leave the building and call the gas company or emergency services from outside. Turning the gas back on should be done by the gas company or a licensed pro. A hissing sound or a damaged pipe means the same steps.
- Damaged building. Deep cracks, warped walls, damaged stairs or sparking wiring mean go out and do not come back in without permission from building inspectors or the authorities.
- No power. Use a flashlight, not candles. Generators, charcoal grills and gas camp stoves inside a home, garage or basement are dangerous because of carbon monoxide.
- The water heater. Look at the tank, the straps, the connections and the floor around it. Before anything is turned back on, check that there are no leaks.
- Contact. Send short messages to family, do not load the network with long calls. Follow official emergency channels.
- Aftershocks. Repeat shocks can come in minutes, hours and days, so do not relax.
Everyone in the family should know beforehand where gas, water and electricity are shut off. A broken gas line is also how a quake turns into a fire, and that is a different kind of cleanup - see what fire damage restoration work involves.
Drying After a Tank Failure
If the tank has already leaked or fallen, the order is: stop the water, cut the power to the wet area, then deal with the room. Before any work on the heater, the power and the gas are switched off.
Record the Damage First
- Photos and video. Take video while the water is still coming, and photos of the ceiling, floor and walls. In a big leak, shoot every place the water reached.
- Date and time. It is better if photos and video show the date and time, though not every camera supports this.
- The insurer. If the home is insured, notify the insurance company within the period stated in the policy.
- A room-by-room list. Put the damage into a list by room, with photos and links to video. Note the approximate area, the place, the finish materials, and the make of the furniture, fixtures and appliances. Keep receipts.
- Keep the failed part. If a pipe, valve or fitting broke, save it.
What Shows Up Later
Some damage does not appear at once. A musty smell or a smell of mold, a creaking wood floor, swollen laminate - this can come weeks later, when everything looks dry. Then it may be necessary to open the floor covering to see what is under it. If such signs appear later, they are recorded the same way as the first damage.
How long the drying itself takes depends on how far the water went. There is a separate guide on how long drying out a house takes. When the water has gone under floors and into walls, it is work for professional water damage restoration in La Jolla, and where moisture stayed too long, for mold remediation in the affected rooms.
Earthquake Water Heater Straps Are the Cheap Part
Straps in the right places, a level and well-fastened tank, flexible connections sealed properly, a relief valve discharge pipe to the drain, a pan where a leak would do harm. For water heater strapping in San Diego, the city bulletin is the reference.
You can read more about our restoration team, see what local homeowners wrote in reviews, browse other articles on our blog, or go back to the La Jolla restoration home page.